I thought it was time to look into HTML5 Canvas as it was a big grey area in my knowledge and therefore something I should investigate, so started out slow with exploring how to draw shapes. In this post, I’ll just cover drawing simple shapes, and move onto paths and curves in future posts.
Rectangles
Filled rectangle
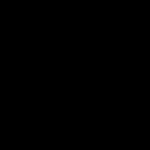
Here is an example of probably the simplest shape we can create – a square:
View demo
The markup
To display a shape in a Canvas, I need to add a javascript portion to the head section of the HTML document which will control what will be displayed in the Canvas element, and then create the canvas element in the body of the page which will reference the javascript portion and pull in any settings set from there.
A filled rectangle can be drawn easily by using the fillRect context and set X and Y position parameters, as well as width and height.
Javascript portion
function draw() {
    	// Filled rectangle
    	var canvas = document.getElementById("rectFilled");
    	if (canvas.getContext) {
        	var ctx = canvas.getContext("2d");

        	ctx.fillRect (0, 0, 150, 150);
    	}
}
HTML portion
<body onLoad="draw();">
    	<canvas id="rectFilled" width="150" height="150"></canvas>
</body>
As you can see, there are four numbers as the parameters for fillRect. These mean as follows:
- Horizontal (X) position (from left)
- Vertical (Y) position (from top)
- Width value
- Height value
In my example, I have set the X and Y positions to 0 so the shape is butted up to the top left corner of the Canvas, and I have set both the width and height to 150 (px) to create the square shape.
Outlined rectangle
As well as a filled rectangle, I can also create one which just has an outline:
View demo
The markup
Javascript portion
function draw() {
    	// Outlined rectangle
    	var canvas = document.getElementById("rectOutline");
    	if (canvas.getContext) {
        	var ctx = canvas.getContext("2d");

        	ctx.strokeRect (0, 0, 150, 150);
    	}
}
HTML portion
<body onLoad="draw();">
    	<canvas id="rectOutline" width="150" height="150"></canvas>
</body>
The markup is exactly the same, apart from that fillRect is replaced with strokeRect in the javascript portion of the markup. Don’t forget to ensure that the IDs relating to the Canvas also match up, or it’ll remain blank. All parameters remain the same to create the same sized and positioned shape. By default, a 1px line is drawn around the shape; we’ll look at styling strokes and fills in a future post.
Clearing rectangle
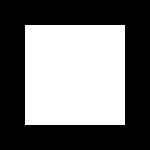
A rectangle can also be used as an eraser of sorts. When the clearRect context is used, anything that is underneath the clearing rectangle gets erased. In my example below, I’ve placed a smaller clearing rectangle on top of a larger black rectangle, and the background colour shows through where the clearing rectangle was placed. To see how other shapes and lines can be ‘erased’, check out my post on erasing on an HTML5 Canvas.
View demo
The markup
Javascript portion
function draw() {
    	// Clearing rectangle
    	var canvas = document.getElementById("rectClearing");
    	if (canvas.getContext) {
        	ctx = canvas.getContext("2d");

        	ctx.fillRect (0, 0, 150, 150);
        	ctx.clearRect (25, 25, 100, 100);
    	}
}
HTML portion
<body onLoad="draw();">
    	<canvas id="rectClearing" width="150" height="150"></canvas>
</body>
Circles
Full circle
View demo
The markup
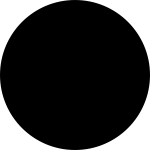
Circles use the arc context, and variables are added as parameters to it.
Javascript portion
function draw() {
    	// Full circle
    	canvas = document.getElementById("circleFull");
    	if (canvas.getContext) {
        	var ctx = canvas.getContext("2d");
        	var x = 75;
        	var y = 75;
        	var radius = 75;
        	var startAngle = 0;
        	var endAngle = Math.PI*2;
        	var antiClockwise = false;

        	ctx.beginPath();
        	ctx.arc(x, y, radius, startAngle, endAngle, antiClockwise);
        	ctx.closePath();

        	ctx.fill();
    	}
}
HTML portion
<body onLoad="draw();">
    	<canvas id="circleFull" width="150" height="150"></canvas>
</body>
Setting up the variables
As you can see, before any drawing is carried out, I have set the variables for:
- The X and Y position of the shape (the default origin for the circle will be top left of the Canvas, so these have to be set so the shape is actually visible)
- The radius of the circle
- The start angle for the circle. 0 means that the circle starts at the 3 O’clock position.
- The end angle for the circle. If we want to specify other angles on a circle, we use multiples of PI, so we have to do a small calculation. PI*1 (or just PI) would be at the 9 O’clock position, PI*0.5 would be at the 6 O’clock position, PI*1.5 would be at the 12 O’clock position and PI*2 would be back at the 3 O’clock position again, so to get a full circle, we need to use this one.
- Whether the shape is drawn clockwise or anticlockwise. Mine is drawn clockwise, by setting
antiClockwiseto false.
Drawing the shape
The shape then has to be drawn on our Canvas. Before when I was drawing rectangles, there was a specialised context set up for them already which would create a filled or outlined rectangle depending on if fillRect or strokeRect was used. With other shapes however, I will have to draw them in a more manual way.
- The first thing I need to do is to indicate that I want to start drawing a shape path. I will do this by adding the context
createPath(it takes no parameters). - I then want to draw the circle. This is achieved by using the
arccontext, then calling in all the variables previously set as parameters (X, Y, radius, startAngle, endAngle, antiClockwise). - Then I close the path by using the
closePathcontext (this also takes no parameters). - The last thing I need to do is decide how I want the circle shape to appear, as it’s just a transparent path at the moment. I have just added a context of fill to very simply fill the shape in with the default fill colour. I’ll look at more exciting ways of styling shapes in a future post.
Half circle
View demo
The markup
Javascript portion
function draw() {
    	// Half circle
    	canvas = document.getElementById("circleHalf");
    	if (canvas.getContext) {
        	var ctx = canvas.getContext("2d");
        	var x = 75;
        	var y = 75;
        	var radius = 75;
        	var startAngle = 0;
        	var endAngle = Math.PI;
        	var antiClockwise = true;

        	ctx.beginPath();
        	ctx.arc(x, y, radius, startAngle, endAngle, antiClockwise);
        	ctx.closePath();

        	ctx.fill();
    	}
}
HTML portion
<body onLoad="draw();">
    	<canvas id="circleHalf" width="150" height="75"></canvas>
</body>
To create the half circle, a 180 degree arc needs to be drawn instead of a full 360, so I just need to change the PI values. My circle above starts at 0 (3 O’clock position as before) and draws 180 degrees around anti-clockwise to the 9 O’clock position (PI). The path is closed and filled.
Third of a circle
View demo
The markup
Javascript portion
function draw() {
    	// Third of a circle
    	canvas = document.getElementById("circleThird");
    	if (canvas.getContext) {
        	var ctx = canvas.getContext("2d");
        	var x = 75;
        	var y = 75;
        	var radius = 75;
        	var startAngle = PI;
        	var endAngle = Math.PI*1.75;
        	var antiClockwise = false;

        	ctx.beginPath();
        	ctx.arc(x, y, radius, startAngle, endAngle, antiClockwise);
        	ctx.lineTo(75, 75);
        	ctx.closePath();

        	ctx.fill();
    	}
}
HTML portion
<body onLoad="draw();">
    	<canvas id="circleThird" width="150" height="75"></canvas>
</body>
For my third of a circle, I have a startAngle of PI, and an endAngle of PI*1.75. This by itself does not make the shape we desire, as the two end points will join up together when a fill is added and there won’t be any lines going to the centre of the circle to create that ‘slice’ shape. So, I shall add an extra context of lineTo with 75, 75 (these are X and Y values) set as the parameters after the arc. This will draw a line to that location (which is the centre of the would-be circle shape) before the path is closed and filled.
Quarter circle
View demo
The markup
Javascript portion
function draw() {
    	// Quarter circle
    	canvas = document.getElementById("circleQuarter");
    	if (canvas.getContext) {
        	var ctx = canvas.getContext("2d");
        	var x = 75;
        	var y = 75;
        	var radius = 75;
        	var startAngle = PI;
        	var endAngle = Math.PI*1.5;
        	var antiClockwise = false;

        	ctx.beginPath();
        	ctx.arc(x, y, radius, startAngle, endAngle, antiClockwise);
        	ctx.lineTo(75, 75);
        	ctx.closePath();

        	ctx.fill();
    	}
}
HTML portion
<body onLoad="draw();">
    	<canvas id="circleQuarter" width="150" height="75"></canvas>
</body>
The quarter circle is created in exactly the same way as the third of a circle, but the endAngle is set to PI*1.5 instead (12 O’clock position).
Other shapes
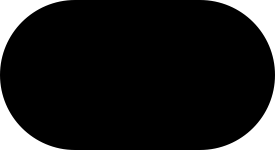
Pill shape
View demo
The markup
Javascript portion
function draw() {
    	// Pill shape
    	canvas = document.getElementById("pill");
    	if (canvas.getContext) {
        	var ctx = canvas.getContext("2d");
        	var x1 = 75;
        	var y1 = 75;
        	var radius1 = 75;
        	var startAngle1 = Math.PI*0.5;
        	var endAngle1 = Math.PI*1.5;
        	var antiClockwise1 = false;

        	var x2 = 200;
        	var y2 = 75;
        	var radius2 = 75;
        	var startAngle2 = Math.PI*1.5;
        	var endAngle2 = Math.PI*0.5;
        	var antiClockwise2 = false;

        	ctx.beginPath();
        	ctx.arc(x1, y1, radius1, startAngle1, endAngle1, antiClockwise1);
        	ctx.lineTo(200, 0);
        	ctx.arc(x2, y2, radius2, startAngle2, endAngle2, antiClockwise2);
        	ctx.closePath();

        	ctx.fill();
    	}
}
HTML portion
<body onLoad="draw();">
    	<canvas id="pill" width="275" height="150"></canvas>
</body>
To create the pill shape, I will need two 180 degree arcs to be drawn. My pill shape example above starts with the first arc (on the left hand side); its start angle is PI*0.5 (6 O’clock position) and draws 180 degrees around clockwise to the 12 O’clock position (PI*1.5). A horizontal line is then drawn from there to the start of the next arc (right hand side), which runs 180 degrees clockwise through from PI*1.5 (12 O’clock) back to PI*0.5 (6 O’clock). The shape is then closed, so there is no need to draw another line connecting the two arcs again.



Hey Michelle,
How would i make a PILL shape, kind of like your ‘Contact Me’ rounded corner floaty…?
I’m playing with a breakout game in canvas and want a rounded pill shape for my power-ups… any idea?
Hi Todd – I have just added a section in the article with markup for a pill shape, I hope this helps!